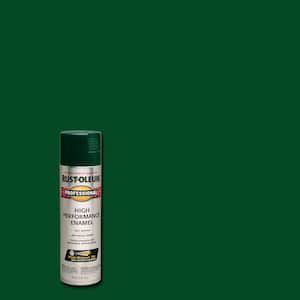
Customer Reviews for Rust-Oleum Professional 15 oz. High Performance Enamel Gloss Hunter Green Spray Paint (6-Pack)
Internet #202058764
Model #7538838
- Effective rust protection for heavy duty, industrial application
- High output tip with any angle spray for ultimate precision
- Fast dry, high performance spray paint covers 14 sq. ft. per can
Customer Reviews
- 4.6out of 2,062 reviews
- 91% recommend this product
5 1585
1585
4 269
269
3 70
70
2 50
50
1 88
88
Filter by:
Showing 1-30 of 2,062 reviews
Sep 17, 2019
The paint itself is high quality. However, of the 12 I purchased 3 did not function no matter how...
The paint itself is high quality. However, of the 12 I purchased 3 did not function no matter how much the cans were shaken. Thanks
by
Response from Rust-OleumSupportSep 18, 2019
We appreciate your feedback and hope you will give us a chance to try to make things right with you! Please give us a call at 800-481-4785 to talk with us further. When calling, please have the 3 cans of Rust-Oleum Professional High-Performance Enamel Spray Paint nearby, so we can collect the batch information.
- Rust-Oleum Product Support 3
- Rust-Oleum Product Support 3

1 found this review helpful
Sep 17, 2019
Went on easy. Looks great.
Went on easy. Looks great.
by
- Verified Purchase
- Recommended
Sep 17, 2019
Used this to paint a home made hitch. Coated well and left a thick glossy finish.
Used this to paint a home made hitch. Coated well and left a thick glossy finish.
by
- Verified Purchase
- Recommended
Sep 10, 2019
this product works very well covers good drys fast
this product works very well covers good drys fast
by
- Verified Purchase
- Recommended
Aug 20, 2019
Great Ford Tractor Paint! Great spray nozzle! Can paint upside down! Very Pleased! AAA+++
Great Ford Tractor Paint! Great spray nozzle! Can paint upside down! Very Pleased! AAA+++
by
- Verified Purchase
- Recommended
1 found this review helpful
Aug 20, 2019
The Rust-Oleum Paint purchase was made for the underside of some of our pick-ups that have some m...
The Rust-Oleum Paint purchase was made for the underside of some of our pick-ups that have some minor rust spots appearing. I'm sandblasting these spots and this paint and some undercoating will make it like new. We own a farm so I'm also using it to re-paint the metal frames on some wheelbarrows that i'm currently re-building to which I have attached an image.
The great part about this item is that the product lasts, the spray pattern is consistent and even and it shines when completed. To me, that brilliant shine represents protection. A vehicle when washed and waxed shines and is protected from the sometimes harsh road elements.
I feel I get the same type of protection on the metal farm items I'm re-building after using Rust-Oleum Paint Products.
by
- Verified Purchase
- Recommended
1 found this review helpful
Jun 25, 2019
covered well.
covered well.
by
- Verified Purchase
- Recommended
Jun 4, 2019
Very bright paint, you can now see my forklift a mile away amongst a forest of vehicles. Only pro...
Very bright paint, you can now see my forklift a mile away amongst a forest of vehicles.
Only problem is that it is slightly transparent so does not cover really well with one coat.
by
- Verified Purchase
- Recommended
May 22, 2019
I use the industrail for everything regardless... My lamppole desperately needed to be sanded n r...
I use the industrail for everything regardless... My lamppole desperately needed to be sanded n repainted..So as you see, I used the industrial black today and the pole looks new again.. Tomorrow I will pull the tape off and all good.. Love the product a++++
by
- Verified Purchase
- Recommended
Apr 9, 2019
Nice bright Safety Yellow. Sprays nice. Do recommend.
Nice bright Safety Yellow. Sprays nice. Do recommend.
by
- Verified Purchase
- Recommended
2 found this review helpful
Mar 19, 2019
If you do the work you're supposed to it can really be a nice paint. Dont be in any rush as I've ...
If you do the work you're supposed to it can really be a nice paint. Dont be in any rush as I've found that after the first coat, a few days (yes days) should be waited for a complete dry. I tried waiting hours and even one day. The paint tends to REALLY orange peel badly in areas if there hasnt been days of drying between coats. I've warmed all my can in warm water. I've warmed what I sprayed in the sun. Ive sanded and cleaned with denatured alcohol. The only thing I can think to give this a smooth and glass like coat is just letting it cure before reapplying coats. The paint really is nice when it's done right.
by
Response from Rust-OleumSupportMar 22, 2019
Thank you for sharing your experience, Jason! To ensure a smooth finish with Rust-Oleum Professional High-Performance Enamel Spray Paint, we recommend applying several light coats a few minutes apart. If needing to wait longer, you want to ensure that any new coats are applied within one hour or after 48 hours. In ideal conditions, this coating fully cures after 7-10 days and the surface may need to be lightly sanded before recoating after this point.
- Rust-Oleum Product Support 3
- Rust-Oleum Product Support 3

- Verified Purchase
- Recommended
Dec 26, 2018
GOES ON SMOOTH, GOOD COVERAGE, DOESN'T FADE, WON'T CLOG NOZZLE, AAAA++++
GOES ON SMOOTH, GOOD COVERAGE, DOESN'T FADE, WON'T CLOG NOZZLE, AAAA++++
by
- Verified Purchase
- Recommended
Dec 18, 2018
GOOD COLOR, COATS WELL, DOESN'T FADE, NOZZLE DOESN'T CLOG, BEST WE'VE FOUND SO FAR...
GOOD COLOR, COATS WELL, DOESN'T FADE, NOZZLE DOESN'T CLOG, BEST WE'VE FOUND SO FAR...
by
- Verified Purchase
- Recommended
1 found this review helpful
Jun 27, 2018
Very easy to use lays down easy. Dries fast. Will have to see how it last in weathering. Used it ...
Very easy to use lays down easy. Dries fast. Will have to see how it last in weathering. Used it as a touch up to the roll on oil based enamel equivalent by same company.
by
- Verified Purchase
- Recommended
Jun 6, 2018
THIS WAS THE BEST SPRAY PAINT I HAVE EVER USED, fast drying, beautiful finish
THIS WAS THE BEST SPRAY PAINT I HAVE EVER USED, fast drying, beautiful finish
by
- Verified Purchase
- Recommended
1 found this review helpful
May 9, 2018
Great product. Each can went a long way painting my metal potion furniture. VERY comfortable spra...
Great product. Each can went a long way painting my metal potion furniture. VERY comfortable spray button. Dries very fast with a beautiful finished. Used as instructed and had NO running of the paint.
by
- Verified Purchase
- Recommended
1 found this review helpful
May 1, 2018
Good size can Very good spray coverage Dries quickly
Good size can
Very good spray coverage
Dries quickly
by
- Verified Purchase
- Recommended
Dec 26, 2017
I used this paint to refurbish a set of Ford F-250 OEM aluminum wheels. I prepared the wheels by ...
I used this paint to refurbish a set of Ford F-250 OEM aluminum wheels. I prepared the wheels by stripping off the clear-coat with aircraft remover, repairing the corrosion damage and some small nicks and scratches with 80 and 320 grit sandpaper followed by a washing with diluted Zep cleaner.
I then used some Prep-All degreaser before spraying the whole wheel with Self-Etching Primer. After drying, I sprayed the outside rim and face of the wheel with Filling Primer. This last step may not have been necessary but I wanted to cover as many imperfections as possible. I next wet sanded the primer with 600 and 800 grit sandpaper and let it dry overnight.
I then put on several coats of matte (flat) black paint and a single layer of matte clear coat a few days later. I used about 3x the paint as I thought I would so getting the 6-pack may have been the better choice cost-wise. It looks pretty sharp and cost a lot less than buying new wheels or used ones that look as good.
by
- Verified Purchase
- Recommended
Nov 9, 2017
Provided great coverage. Very shiny finish and looks amazing. Made my buggy look new again!
Provided great coverage. Very shiny finish and looks amazing. Made my buggy look new again!
by
- Verified Purchase
- Recommended
Nov 1, 2017
Great coverage with no dripping when following user instructions. Paint adheres very well to rubb...
Great coverage with no dripping when following user instructions. Paint adheres very well to rubber material as well as recommended surfaces and doesn't flake off easily, even under stress.
by
- Verified Purchase
- Recommended
1 found this review helpful
Oct 29, 2017
Completely ruined my paint job. The first two coats were from a previous can but identical produc...
Completely ruined my paint job. The first two coats were from a previous can but identical product (Rust-Oleum Pro dark machine gray gloss) and they went on fine. The finish was a bit rough so I wet sanded after 48 hours with #800 grit and purchased a brand new identical can to put one last finish coat. I cleaned the surface after sanding and I thought I would get a superb finish over such a nice smooth surface. I made sure to shake the can for a good 4-5 minutes and as soon as I sprayed it, it began to wrinkle (see photo). Now I have to sand it all down and see what I can do. This is unacceptable.
by
Response from Rust-OleumSupportOct 31, 2017
Oh no, something is amiss here, Nick! It sounds like you're experiencing dry spray with Rust-Oleum Professional High Performance Enamel Spray. This is when the product dries before it hits the surface of your project. This occurs most often when users hold the can too far from the surface when spraying - our recommendation is 10-16" from the surface. Effects of dry spray can also happen when temperatures are too high or too low. You can try using a lint-free rag slightly damp, and gently wipe the surface to remove the dusting. If it's still rough after doing that, you'll want to sand the surface with a 180 or 220 grit sandpaper and make sure it's clean and dry before recoating. Make sure the surface is completely clean before application and recoat with 1 hour or after 48 hours to avoid wrinkling.


3 found this review helpful
Oct 18, 2017
Perfect paint for resurfacing those old 15 time painted electrical panels I hate those painters t...
Perfect paint for resurfacing those old 15 time painted electrical panels I hate those painters that do not protect electric panels and they paint them.
Now my panel looks like new.
by
- Verified Purchase
- Recommended
Oct 17, 2017
I got this to use for a new project a combination temperature and humidity control. The Rust-Ol...
I got this to use for a new project a combination temperature and humidity control.
The Rust-Oleum Professional 15 oz. Gloss Royal Blue Spray Paint is versatile and easy to work with what you can do with it is really only limited by your own imagination.
This is being done as a special super review .
The finished product is a combination temperature and humidity controller. it can be used for a egg incubator, exotic pet snake tank, water dragon tank, and cigar humidor, etc.
The list of parts for this project are :
a leviton 15 amp duplex outlet
a leviton single gang duplex outlet cover
a Carlon 1-Gang 18 cu. in. PVC Old Work Box
a leviton 2 gang decora black switch plate
a Carlon 2 gang 32 cu new work box
a HDX 15 amp 120 volt 3 prong grounded 6 foot appliance cord
14 and or 16 gauge wire
a wire nut for said wire
4 Everbilt #6 x 3/4 in. Zinc-Plated Pan-Head Phillips Drive Sheet Metal Screws
a temperature control
a humidity control
Rust-Oleum Professional 15 oz. Safety Red Inverted Marking Spray Paint and Rust-Oleum Professional 15 oz. Gloss Royal Blue Spray Paint
Easy MaskKleenEdge 0.94 in. x 54-2/3 yds. Low Tack Painting Tape, news paper.
vinyl letters
2 sets of Everbilt #8-32 tpi Zinc-Plated Machine Screw Nut with
Everbilt #8-32 in. x 1 in. Truss Head Combo Zinc Machine Screw
The wire nut and wire strippers came from the GARDNER BENDER304-Piece Electrical Project Kit, Includes Tools, Tester, Wire Nuts, Cable Ties, Staples and Tape in Reusable Canister
tools : black magic marker, drill, knife, flat and Phillips screw driver, wire strippers, straight edge or ruler, needle nose pliers, precision small screw driver set, multi meter
step 1 : remove the mounting screws from the outlet
2] put the outlet into the the holes for the switch plate and the outlet cover, use a black magic marker to mark the mounting holes
3] drill out all of the holes so the screws will fit snugly.
4] take the outlet cover and cover 1/2 with the news paper using the painters tape and paint it red and put it aside.
5] take the back wire cover off the temp control, hold it up to the decora switch plate for each hole and use the marker to mark off the excess plastic on the left and right sides.
this should be done on the back side, the wire covers are dis-guarded.
6] using the knife cut away the excess plastic so the temp control will fit into both holes snugly with out moving up or down.
7] take both box's, where they will connect together and mark a center line, the 2 gang box needs to have the mounting ears facing down.
8] measure 1 inch from the back of the 2 gang box and make a x on the center line, now measure 2 inchs up put a - and then out from each side of that - and make a x in each spot.
9] do the same to the 1 gang box
10] drill out the outer x holes so the nut and bolt combos will fit the outer holes
11] drill out the center x hole to 1/2 , 5/8 or 3/4 inch
12] on the back of the 2 gang box their is a knock out opposite the wings
13] above the knock out drill 2 holes so a sheet rock screw can fit in them but not the head.
14] pop the knock out, out, and use the knife to cut from the knock out up to the outer edges of the holes so you have a hanging hole with a slot that will hang on a dry wall screw.
15] on the inside of the 2 gang box their are wings on each side of the wire holders that need to be removed.
as they stick out past the screw mounting posts
they can be cut out with the knife, i did that the first few dozen times.
then I started drilling the out side wing area and rip them out with needle nose pliers from the inside.
this is all so the temp and humidity controls will fit.
16] the decora face plate can be placed on the front of the 2 gang box, use the screws to make sure the mounting holes line up correctly, make a line on the back of the face plate where it meets the edge of the 2 gang box on the bottom where it will connect to the 1 gang box.
17] now the top and bottom box's can be bolted together.
18] using the sheet metal sheers cut the plastic line across the bottom of the decora face plate. put it aside.
19] the power wire comes in the bottom of the 1 gang box through a wire holder and the ground from it can be screwed onto the earth ground of the outlet and so can the neutral wire.
20] the hot wire gets connected to 4x 14 or 16 gauge wires with the wire nut and they get run through the hole from the 1 gang box into the bottom of the 2 gang box
21] those 4 wires left to right connect to pin 1 solenoid supply and pin 3 power supply on both controllers, you can connect them later.
the pin numbers are facing the back of the controllers
22] 2 ground wires are connected to the second screw of the neutral on the outlet and are run to pin 4 return on both controllers, for now they can be run through the hole box 1 to box 2 they are connected later.
23] break the tab connecting the 2 screws together on the outlet for the small spade hot wire
24] connect 2 wires 1 to each screw these are your feed wires they will connect to pin 2 on each unit, they can be run through the hole.
25]pry open the wire holders with a screw driver and put the humidity sensor wire in the top section and the temp sensor wire in the lower section, both in the lower wire holders of the left side facing the front of the unit.
26] take the tape off the one side of the outlet cover , reverse it and paint the other side blue.
27] take the decora face plate and with the cut side facing down put the temp control in the lower spot so the cut edge is below it.
28] using the wire strippers strip 1/4 inch off the ends of all of the wires after they have been cut to a appropriate length, remembering the extra wire goes into the bottom on the 1 gang box.
29] using the small screw drivers connect the sensor wire first to the temp control from the temp probe, then connect the rest of the wires as described above. using the multi meters beep for closed circuit function to determine which wire is which if their all the same color, the hot feed wire should go to the left side of the outlet.
30] now put in the humidity control, you can see it blocks the screw blocks on the temp control, which is why it had to be done in the correct order. now connect all of the wires as listed above and match up the sensor wires to the listed colors on the wire diagram on the control box, ignoring the rest of the wiring diagram. hot feed to right side outlet.
31] now for the real fun, carefully push the face plate with the now wired up and mounted controls into the 2 gang box, while gently pulling on the sensor wires so they are not jammed in the box and the same to all of the supply wires pulling the excess into the base of the 1 gang box under the outlet.
32] once the face plate is close enough , put in your screws and gently start tightening it so the face plate depresses into the 2 gang box. once it is behind the front of the single gang box that sits out 1/2 further then the 2 gang box your good.
33] gently squash all of the extra wire down into the single gang box so the outlet will fit in their.
if your wires are too long now is the time to shorten them.
34] you can put your vinyl letters on top of the humidity and temp controls
35] if the outlet cover is dry you can mount it using its 3 screws, dont put on the vinyl letters just yet in case you reversed the feed wires.
plug it in and your all set, if the feed wires are correct for function you can put on your vinyl letters. other wise just reverse the outlet cover.
I developed this entire project off the top of my head, their are no blue prints or diagrams and this is the first time I have ever typed out a entire procedure of how I build them.
This is how to build the combination single zone temperature with humidity control.
I also build multi zone temp controls some with over temp alarms.
EVERY THING beyond the temperature and humidity controls them self's was purchased at Home Depot.
by
- DIY
- Recommended
1 found this review helpful
Aug 8, 2017
So easy to use. I found two old wrought iron tables that were chipping paint and rusty. All I did...
So easy to use. I found two old wrought iron tables that were chipping paint and rusty. All I did was go over them with a steel brush and painted them. They have gotten so many compliments. Paint covered completely, over rust and chipped areas and coated them evenly. Though it's white, the white is deep and smooth. Love it and it dried so quickly too. Can't wait for my next project to use it on. Great Paint and so easy to use!
by
- Verified Purchase
- Recommended
2 found this review helpful
Jul 11, 2017
LOVED THE COLOR AND TEXTURE .... NICE RESULTS.
LOVED THE COLOR AND TEXTURE .... NICE RESULTS.
by
- Verified Purchase
- Recommended
May 23, 2017
Does the JOB!!! Great for Fire Hydrants and ALL safety areas!
Does the JOB!!! Great for Fire Hydrants and ALL safety areas!
by
- Pro
- Verified Purchase
May 9, 2017
Probably the easiest spray paint I've ever used. I got some other brand name spray paint and it s...
Probably the easiest spray paint I've ever used. I got some other brand name spray paint and it started dripping out of the can when I was spraying it. I got this to fix what had happened with the other stuff. It was very light and easy to use, will use again for sure!
by
- Verified Purchase
- Recommended
5 found this review helpful
May 2, 2017
Used this product in White to paint my interior doors ( on the flat ) and the result was a brilli...
Used this product in White to paint my interior doors ( on the flat ) and the result was a brilliant glossy finish without brush marks or runs that you would get normally. Required a room with a fan exiting air and a respirator.
by
- Verified Purchase
- Recommended
1 found this review helpful
Apr 25, 2017
This product worked great on the curb that i was repainting. It dried quickly and the spray was c...
This product worked great on the curb that i was repainting. It dried quickly and the spray was consistent. Happy with the results and the driveway is safer to use as a result.
by
- Verified Purchase
- Recommended
1 found this review helpful
Apr 25, 2017
We have a bench on our front porch that has weathered the elements over several years. After a qu...
We have a bench on our front porch that has weathered the elements over several years. After a quick easy application of Rust-Oleum Professional Black to the metal frame, the restoration of our bench was remarkable! It looks better than it has in 10 years!
by
- Verified Purchase
- Recommended
Showing 1-30 of 2,062 reviews
Compare Similar Items
current item | |||
Surface Material Use | |||
|---|---|---|---|
Concrete, Masonry, Wood | Concrete, Masonry, Wood | Concrete, Masonry, Wood | Concrete, Masonry, Wood |
Paint Key Features | |||
Any Angle Spray, Rust Preventative | Any Angle Spray, Rust Preventative | Any Angle Spray, Rust Preventative | Any Angle Spray, Rust Preventative |
Paint Product Form | |||
Aerosol Spray | Aerosol Spray | Aerosol Spray | Aerosol Spray |


