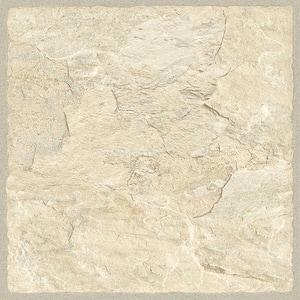
Questions and Answers for TrafficMaster Sedona 4 MIL x 12 in. W x 36 in. L Grip Strip Water Resistant Vinyl Tile Flooring (24 sqft/case)
Internet #202075782
Model #260110
Store SKU #145126
- Ceramic bead surface coating resists scratches and stains
- Water resistant flooring installs easily using GripStrip design
- Can be installed over concrete, tile, vinyl or wood
Questions & Answers
A: Thanks for your question. Sedona and Corfu are different colors.
A: Thank you for your question- Our products are low VOC- Please see https://images.thdstatic.com/catalog/pdfImages/b4/b450a917-2eac-48a4-af2e-0072fb0b8aee.pdf
A: We have not noticed any excess odor from the box or once installed. We installed this style and wood look planks on most of the main floor and it is decidedly better from a health perspective than the carpeting it replaced.
A: I’m sure !
A: Thanks for your question,. You cannot use a steam mop with our Trafficmaster flooring. It will harm the planks and the adhesive.
A: Thanks for your question. You cannot use any type of steam mop on the tiles. The heat will harm them.
A: I would guess just the opposite. When first introduced, Home Depot stocked many colors. Overtime, stock shifted from local stores to special order.
A: they have discontinued that particular one , but the single tils have lost of options
A: I'm pretty sure it's discontinued. Go with luxury vinyl. Much much much better product. I replaced this stuff after two years with luxury vinyl and everyone is much happier.
A: Hi.. I used a utility knife against a straight edge. No problems.
A: Thanks for your question. We recommend a sharp utility knife.
A: Used a straight edge and a razor knife
A: Measure & Mark them face up with a (sharp pencil only). Draw lines if needed. Then using a guide, like a square or a metal straight edge for example, to guide you and the blade. Then score your lines with a utility knife and carefully bend the cut open, then close and snap forward. Like opening and closing a book. If done correctly, you will get a clean break. You can practice on a scrap piece of flooring, if you are unsure of yourself. For fitting your floor around doorways. They make a special saw to cut jambs & stop moldings at doorways. Ask your Home Depot for assistance with tools needed. This tool will allow you to slip the flooring under the door jamb(s)to hide the gap, which said gap is required by the manufacturer. I suggest you cut all your door jambs first,prior to starting the install. IT IS EXTREMELY IMPORTANT THAT YOU KEEP YOUR OLD FLOOR IMMACULATE, AS YOU INSTALL YOUR NEW FLOOR. SO NO DEBRIS IS LEFT UNDER YOUR NEW FLOOR.When multiple cuts are needed on the same piece, (like fitting around a doorway mark, score and use scissors. Cut carefully, there are no do-overs. Remember you need to leave 1/4" gap (gap varies by manufacturer) around the perimeter of your entire floor, for expansion & contraction purposes. For fitting your floor around doorways, remember to allow for going under your door jams that you precut prior to starting the floor, so an unsightly gap, does not show. SQUARE YOUR ROOM(S) START WHERE IT IS VISIBILEY MOST NOTICABLE, LIKE IN FRONT OF YOUR KITCHEN CABINETS FOR EXAMPLE. IT IS VERY IMPORTANT! IF YOU DON'T MAINTAIN A SQUARE START YOUR FLOOR WILL RUN OFF SQUARE. KEEPING THINGS SQUARE ARE CRITICALLY IMPORTANT IF YOU ARE DOING MULTIPLE ROOMS THAT ARE LINKED TOGETHER! AS iT WILL BE IMPOSSIBLE TO CORRECT LATER. ERRORS LIKE THAT ON LONG DISTANCES WILL MAKE YOUR FLOOR LOOK COCKIDE, & AMATEURISH, AND UNCORRECTABLE! SO, TAKE YOUR TIME, PLAN & THINK CAREFULLY! UNTIL YOU FEEL COMFORTABLE WITH THE PROCESS. IF YOU ARE UNSURE OF A CUT, PRACTICE ON A SCRAP OF FLOORING, UNTIL YOU GET THE FEEL OF IT. Make sure you have all the proper tools prior to install. I also suggest you use a good quality silicone caulk to caulk around/behind fridges,dishwashers,washers/dryers, etc. Where water could seep under your new floor, areas that are or might be hidden from view! Caulk & let set up prior to & BEFORE you put your finished trim around the perimeter of your finished floor. An before you put back any appliances. Which reminds me, do not cheat and go around any appliances with your floor. YOU MUST REMOVE AND INSTALL YOUR FLOOR UNDER ALL APPLIANCES!!! INCLUDING TOILETS & PEDESTAL SINKS! Otherwise you will have issues later, and your new floor could be compromised. Also prior to starting your new floor, make sure your old floor is secure and sound. If there are any loose or curling spots they must be corrected and fixed prior to starting your new floor. They make a leveling compound to fix any areas that might need addressing.Your new floor floats, so it needs a flat & sound surface to sit on. Otherwise you may compromise the new floor & your floor warranty/guarantee. Most times the prep is more important than the install. Also remember some floors require a pad under them before installing your new floating floor. I only use the best padding, as it supports the floor, & there are no do overs on this issue. If your OLD floors are cold to walk on. You can put down an insulator first prior to the padding that will keep your floors warmer underfoot. You can use (Aluminum Foil Faced Kraft Paper Fiberglass Insulation) (you just unroll it, it is flat, and put it down as as first step, after prepping your old floor). It will dramatically change your floor temperatures underfoot. Especially on floors over garages.Can also be used under carpeting in your home & in basements. See manufacturers recommendations for all applications. This will give you an opportunity to save heat & air conditioning costs. Along with the joy you get from your new floor. Just remember, measure twice, cut once. Note: save ALL your scraps till the end! You will be able to use a lot of them during your install. I KNOW YOU WANTED TO KNOW HOW TO CUT THIS FLOORING. BUT, THIS IS ALL JUST AS CRITICAL TO HAVING A FANTASTIC OUTCOME! A FINAL NOTE: THIS FLOORING HAS AN EXTREMELY STICKY GLUE AT THE JOINTS. TAKE YOUR TIME ASSEMBLING THE PIECES TOGETHER. GETTING THEM APART IF YOU ERR. IS ALMOST IMPOSIBLE! THERE IS A TRICK TO PREVENT THIS ISSUE, BEND YOUR SECOND PIECE ONTO YOUR FIRST SO AS TO CAREFULLY LINE UP THE ADHESIVE JOINTS. THIS GIVES YOU MORE CONTROL ON ASSEMBLING THEM TOGETHER. PRACTICE ON SOME BEFORE YOU DO YOUR ACTUAL FLOOR. BETTER TO RUIN A COUPLE PIECES, THAN YOUR ENTIRE NEW FLOOR. HAVE FUN!!!
A: Score the tile several times with a utility knife and then snap in half over your knee. If your're only cutting off a small piece, you might need a pliers to break it off.
A: Unless someone has glued it to the subfloor, you should be able to pick it up, break it and discard it. The tiles adhere to each other but just lie on the subfloor by gravity.
A: its easy if you did not glue it down, it's to be instaled as a floating floor so start anywhere and lift it up it should come right up
A: Thanks for your question. They can be cut and removed or you can heat the seams with a heat gun and pull them apart. Since they're floating, they're not a mess to remove.
A: They are EXTREMELY difficult to separate, (if that is what your asking). When initially installed they are difficult to get apart as the adhesive they use is VERY sticky. (Based on my personal experience at time of my initial install). I have never tried to separate them once they have been down for any length of time. However, you might try using a blow dryer(s) to soften them and the adhesive at the joints, sides and edges where the adhesive is located. You might need several blow dryers with several people to keep the areas warm enough at the same time to separate. I suggest, you look over a piece, you had left over from original install. To refresh your memory, on how they went together at that time. If you DON"T have any left over, visit your local store, to look some over, prior to attempting this project. You can always buy a few sections or a full box to experiment on at home with, if you did not save any from original install. Once you get the feel of how they come apart. I would suggest you try this on a inconspicuous area on your existing floor to experiment, if possible. Remember this is a floating floor. It only glues to itself, not the surface it sits on. Also remember, if you replace only pieces/sections, they may not match exactly. Due to different lot #'s and times of manufacture. Lot #'s should always match for best outcomes. Or it will look like a cheap suit; almost match BUT not quite there.Hope this helps!
A: Don’t buy it, mine all went back because it had so many broken corners
A: Thanks for your question. It looks like shipments will be coming in starting June 3rd. As soon as we check it into the warehouse, it will be available to order on homedepot.com.
A: I suggest you check with other stores/suppliers to locate what you need. You could always call the manufacturer, to help you locate the product, and get it shipped to you as long as the product is still in production. Make sure it all the same lot number!!!!
A: Thanks for your question. This product will be back in stock 5/14-5/21. We have several shipments coming it during that time. Once they've been checked into our warehouse, they'll be available to order on homedepot.com.
A: Not me
A: Thanks for your question. We've seen customers use the product in motor homes but we do not recommend it. In order to be warrantied and perform properly, the planks/tiles must be kept climate controlled between 65°F and 85°F.
A: I received this answer to my question: "Thanks for your question. We've seen customers use the product in motor homes but we do not recommend it. In order to be warrantied and perform properly, the planks/tiles must be kept climate controlled between 65°F and 85°F" That's great. My motor home is climate controlled 24/7/365. That said, can I assume the warranty would be honored? While I'm thinking about that, if climate control is a huge issue, what happens to the product when the power is off for a week or two as is possible in Florida during hurricane season? How about vacant houses?
Compare Similar Items
current item | $4.19 /sq. ft. ($66.33 /case) | $4.19 /sq. ft. ($66.33 /case) | |
Product Length (in.) | |||
|---|---|---|---|
36 in | 18 in | 24 in | 24 in |
Underlayment Options | |||
Underlayment Not Required | Underlayment Not Required | Underlayment Required - Pre-Attached | Underlayment Required - Pre-Attached |
Flooring Look | |||
Stone Look | Stone Look | Wood Look | Stone Look |


